 English
 Español
  Português
  русский
  Français
  日本語
日本語  Deutsch
  tiếng Việt
  Italiano
  Nederlands
  ภาษาไทย
  Polski
  한국어
한국어  Svenska
  magyar
  Malay
Malay  বাংলা ভাষার
  Dansk
Dansk  Suomi
Suomi  हिन्दी
  Pilipino
  Türkçe
  Gaeilge
  العربية
  Indonesia
  Norsk
Norsk  تمل
تمل  český
český  ελληνικά
  український
  Javanese
  فارسی
فارسی  தமிழ்
தமிழ்  తెలుగు
  नेपाली
  Burmese
  български
  ລາວ
ລາວ  Latine
  Қазақша
  Euskal
  Azərbaycan
  Slovenský jazyk
  Македонски
  Lietuvos
  Eesti Keel
  Română
  Slovenski
  मराठी
मराठी  Srpski језик


How To Install A Lock On A Cabinet
Locking up your cabinets can help you keep your valuables safe. Locks are an affordable way to add an extra layer of protection to the things in your home, especially when it comes to securing cabinets and other spaces that might have valuables in them. Installing a lock on a cabinet or other space is relatively simple and takes just a few quick steps. This post will show you how to install a lock on a cabinet in details.
Step 1–Determine where to place the lock
Before you buy the lock, take a look at where you’re planning to place it. Locks for cabinets need to be placed in a way that prevents them from being easily opened. Ideally, you should have at least one side of the cabinet that has enough room on it so that you can place the lock without hitting any other part of the cabinet.
If the lock is going to be placed on a cabinet door, make sure that you leave some room in front of the door so that you can unlock it without having to force the door open. You also want to ensure that there is enough room on the opposite side of the cabinet so that you can remove the whole interior and then replace it. This will help prevent damage to your cabinet from excessive weight.
Step 2–Remove screws from the inside cabinet
Remove all interior screws for the lid or front doors of your cabinets. You should also remove any screws holding the interior trim on the inside of your cabinet. If you’ve already removed all interior screws, you will also need to take out any paneling or trim that is on the inside of the cabinet.
Take a clean cloth or towel and clear away any debris from your cabinets and then wipe down the inside of all doors with only a couple of drops of oil. This will help prevent rust while preserving your finish.
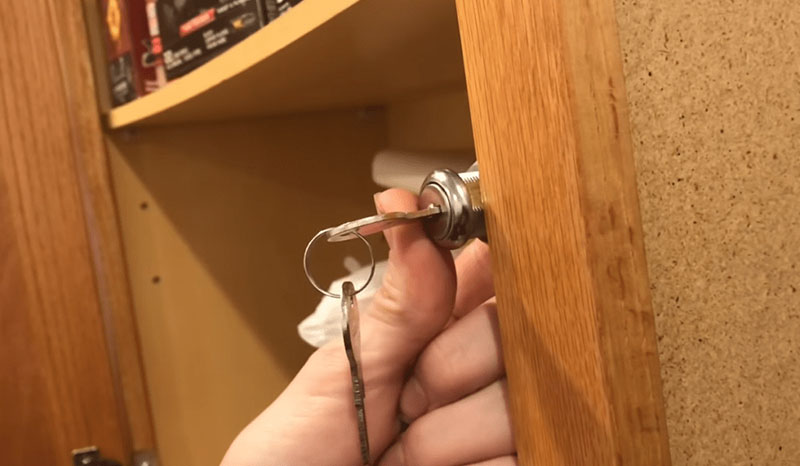
Step 3–Install the lock
Locks for cabinets don’t need to be complicated and there are plenty of options for different price ranges. First, you will want to decide what kind of lock you want to install. If it is just going to be used by the homeowner, then a deadbolt might not be necessary.
However, if you’re planning on renting out your house and having an extra layer of protection so that someone won’t rob it while they are staying there, then a more secure locking mechanism is needed. The deadbolt can be installed by a professional, or you can do it yourself if you have the right tools.
If you are installing a deadbolt in your cabinet, then follow that lock’s instructions and secure it onto the inside of the cabinet door. Don’t forget to take your time and make sure that everything is tightened properly so that there is no room for slippage or movement of any kind.
If you are installing a simple lock into your cabinet, then you just need to secure it in place with the included screws or bolts. You should place the lock in a way that allows you to insert or remove items from your cabinet easily. This will also prevent the lock from being too heavy and peeling off of your cabinet with regular use.Step 4–Remove the interior trim
Take the interior door panel of your cabinet and place it on an old towel or rag. Use a screwdriver to remove all of the screws from inside the panel. You can then set these screws aside so that they don’t get lost.
Next, you want to look at where the hinges connect to your cabinet and unscrew them. Take a paint scraper or brush and carefully scrape off any gunk that is on your cabinet’s hinges.
Next, move to your kitchen cabinet drawer. This is also a good time to remove any parts or accessories that you will not be needing for a while. You should then clean this up with soap and water to get rid of any grime before replacing the interior trim. Take your time and make sure that you don’t rush this step so that everything goes smoothly.
Step 5–Replace interior trim
After you’ve finished cleaning and removing the old interior door and drawer panels, you can begin to replace them. You should work one side of your cabinet at a time. Once you’re done, you can move on to the next.
It’s a good idea to take your time with this step so that everything is put back together in a tidy manner. If you’re not sure where to begin, consider taking a picture of your cabinet and then marking it with the approximate placement of each part before you begin.
Step 6–Test the lock to ensure that it functions properly
When replacing your doors and drawer panels, be sure to remove any screws that are in the door’s frame or assembled into your panel. It is advisable to test the lock to ensure that it works properly before you reinstall them. Take the lock to your cabinet and use a screwdriver to remove all of the screws that are on the inside of your cabinet.
If you’ve installed a deadbolt, then insert your key into the lock and turn it in either direction so that it operates properly. If you haven’t installed a deadbolt and instead secured the lock to your cabinet with screws, then use a screwdriver to remove all of those screws. The screws should be removed by simply unscrewing them.
Step 7–Secure the interior trim
When you’re finished removing any interior screws or bolts that are still in your cabinet, it’s time to replace your interior trim. This is quite simple as you just need to put the trim back in place and then insert the screws into your cabinet so that it is secured in between your cabinet’s frame. Do not over-tighten any screws because this could damage your trim or lock.
Step 8–Test your lock again
If you’ve replaced a deadbolt, then you already know how it will work, but if you installed a simple lock, then test it again to make sure that everything works properly. Turn it in both directions to ensure that the lock will work with ease. If there are any problems, then you will have to remove the lock and start over from the beginning. However, if everything works perfectly, then you can move on to the next step.
Step 9–Install or replace interior doors or drawers
The last step is to install your interior doors and drawers. Make sure that all of your previous screws are inserted into their proper positions before putting everything back together. In most cases, you will want to install your doors or drawers first and then the trim. However, some people prefer to put everything together one piece at a time.
When you have finished with your interior doors and drawers, it’s time to replace the interior trim by putting the trim back in place. Then you can secure it with all of the screws that you removed earlier on top of the cabinet door frame. After you’ve finished with that, it’s time to insert the I.D. panel into place followed by the doors, and then lastly, the cabinet drawers.
Conclusion
Cabinet locks can be extremely useful if you are concerned about break-ins or if you have a family member who is prone to being forgetful when it comes to where they store their valuables. There are quite a few different types of cabinet lock options available, so you should be able to find one that is suitable for your needs easily.
Previous:Why We Require Disc Locks
Send Inquiry


X
We use cookies to offer you a better browsing experience, analyze site traffic and personalize content. By using this site, you agree to our use of cookies.
Privacy Policy